[host]$ wget http://fosslab/freedos.qcow2
::About::
This is Vijay Kumar's personal blog. Here you will find his explorations into GNU/Linux, Art, Embedded Systems, ...
vijaykumar
AT
bravegnu DOT org
::Archives::
::Tags::
8051
arm
ascii-art
blosxom
chennaipy
design-pattern
doc
embedded
erpnext
foss
git
gtk
java
ldap
linux
linux-kernel
pyconindia
python
qemu
svn
thinkpad
vector-art
wikipedia
zigbee
::Top Stories::
::Promos::
![[FSF Associate Member]](http://static.fsf.org/nosvn/associate/fsf-11643.png)

~vijaykumar
[ Home | Feed | Twitter | Vector Art | Ascii Art | Tutorials ]
Virtualization Lab
Mon, 21 Mar 2011
The development of the FOSS Lab Manual for the Anna University Syllabus is underway at Google Code. The contents for the first Virtualization lab is available in this post. Post your suggestions and feedback.
Objective
Learn how to install and run a guest OS within Qemu.
Booting FreeDOS
Step 1: Getting the disk image
The contents of the emulated hard disk is stored in a file. When the guest system accesses the hard disk, the data is stored and retrieved from the file. Download the disk image containing a FreeDOS installation from http://fosslab/freedos.qcow2
Step 2: Booting the disk image
Start Qemu by specifying the FreeDOS disk image using the -hda option.
[host]$ qemu -hda freedos.qcow2
Step 3: Switching between host and guest
When the guest window is clicked, Qemu enters the "Grab mode". In Grab mode, all keystrokes are sent to the guest. To exit Grab mode, and give back control to the host press and release the Ctrl-Alt key combination.
Step 4: Shutting down the guest
After using the guest, the guest can shutdown like a normal system, by issuing the OS' own shutdown command. In the case of FreeDOS issue the halt command.
C:\> halt
Installing FreeDOS
Step 1: Creating the disk image
The disk image into which FreeDOS will be installed is created first. A 100MB disk image should be sufficient for the FreeDOS installation. The qcow2 format will be used, because of its size advantages.
Create the disk image using the qemu-img command. The create sub-command is to create hard disk images. The format is specified using the -f qcow2 option. The hard disk image file to be created is specified as the first argument. The hard disk image size is specified as the second argument.
[host]$ qemu-img create -f qcow2 hd.qcow2 100M
Step 2: Get the FreeDOS installation CD
Download the FreeDOS installation CD available from http://fosslab/freedos.iso
[host]$ wget http://fosslab/freedos.iso
Step 3: Boot the FreeDOS installation CD
The guest is booted from the FreeDOS installation CD and the installer installs FreeDOS on to the hard disk. Start Qemu by specifying the hard disk image using -hda option, the CD-ROM image using -cdrom option. Now, since there are two bootable media - hard disk and CD-ROM, the CD-ROM drive is specified as the boot media using -boot d option. In the boot option, the hard disk is represented using the drive letter c and the CD-ROM is represented using the drive letter d.
[host]$ qemu -hda hd.qcow2 -cdrom freedos.iso -boot d
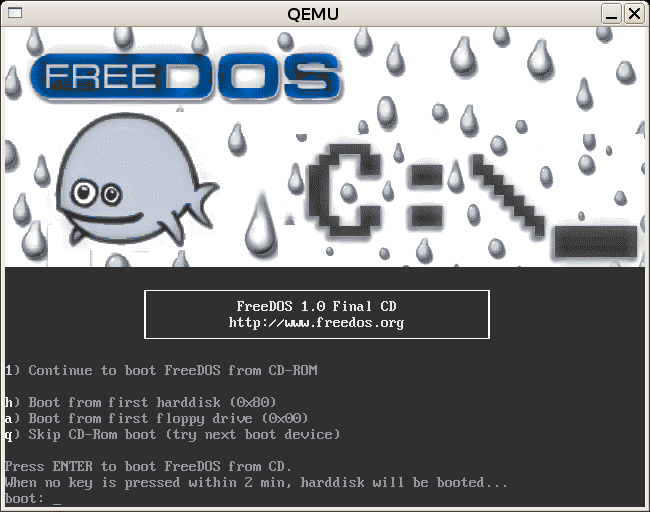
-
In the installation CD boot prompt, press Enter to continue booting the installer.
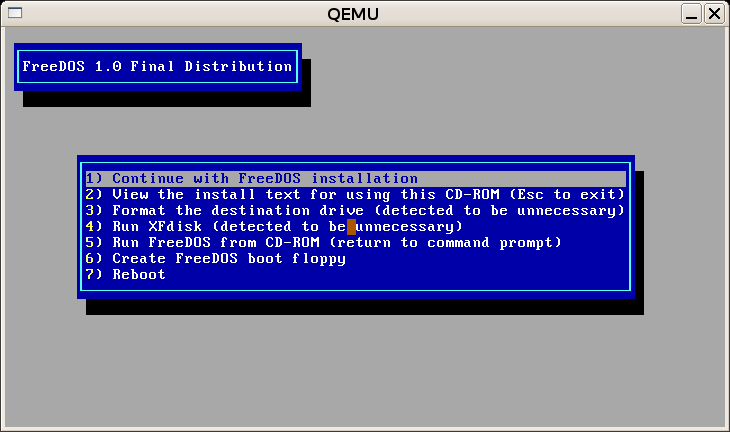
-
In the installer menu select Install to harddisk using FreeDOS SETUP, and press Enter.
-
Select the language and keyboard layout as English (US).
Step 4: Partition the hard disk
The created hard disk image is like a blank hard disk, and does not contain partitions. Atleast one partition has to be created to install the OS.
-
Select Prepare the harddisk for FreeDOS by running XFdisk, to start the partitioner.
-
Select the un-partitioned free space, and press Enter, to open the Options menu.
-
From the Options menu, select New Partition and press Enter.
-
From the New Partition sub-menu, select Primary Partition and press Enter.
-
Specify the partition size as 100 and press Enter, to create a partition of size 100MB.
-
Select YES in the Initialise Partition Area dialog box, to format the created partition.
-
Select YES in the Initialise Partition Area dialog box, that appears again. For some reason unknown to the author, this is asked twice.
-
Press F3 to quit the partitioner.
-
Select YES in the Write Partition Table dialog box, to write the partition table to disk.
-
Select YES in the Restart Computer dialog box. If after selecting the option the guest does not restart. Close Qemu, and restart Qemu with same command as before.
-
When the system boots back, follow the 3 instructions in step 3, to reach the installer menu.
-
Select Continue with FreeDOS installation, to resume the installer.
Step 5: Install FreeDOS
-
Select Start installation of FreeDOS, to start the installation.
-
Make sure you read the copyright notice and press any key.
-
The installer prompts for the OS install path with C:\FDOS as default. Press Enter to accept the default.
-
The installer prompts for the programs to be installed. Check/uncheck programs as required using the Space key. Press Enter when done.
-
The installer installs the OS and the selected programs.
-
Enter Y when asked if the system can be rebooted. If the guest does not restart, close the Qemu window, and invoke Qemu by specifying the hard disk image alone.
[host]$ qemu -hda hd.qcow2
Saving and Restoring Guest State
Step 1: Boot FreeDOS
First boot into the guest system, using the steps described in section [boot-freedos].
Step 2: Save the guest state
The current state of the guest system can be saved using the savevm command in the monitor interface.
-
Switch to the monitor interface by pressing Ctrl-Alt-2.
-
Save the guest state using the savevm command, with the tag booted.
(qemu) savevm booted
Step 3: Restore the guest state.
The guest state can be restored using the loadvm monitor command.
-
Switch back to the console using Ctrl-Alt-1.
-
Make some changes to the filesystem by creating files.
C:\> echo hello > file.txt
-
Go back to the monitor interface and restore the guest state using the loadvm command.
(qemu) loadvm booted
-
Go back to the console and check for the file file.txt.
Step 4: Start from saved guest state.
-
Shutdown the guest system using the halt command.
-
Start the guest system using the saved guest state, by specifying the -loadvm option to qemu. The option accepts the tag as argument.
[host]$ qemu -hda hd.qcow2 -loadvm booted
Permalink | Add Comment | Share: Twitter, Facebook, Buzz, ... | Tags: doc, qemu
blog comments powered by Disqus
![]() |
|
![]() |
|
![]() |
|
![]() |
|
![]() |
|
![]()